


Tuesday, June 30, 2009

Tutorial Tuesday: Luggage Handle Cover

This is such an awesome tutorial found HERE! I made one for myself to attach to my luggage, only I substituted snaps for the Velcro. Makes your luggage easily identifiable and a little more stylish!


What you'll need:
*2 pieces of 6" x 6 ½" fabric
*1 piece thin batting 6" x 6 ½"
*5 " of sew-on Velcro
*Iron
*Sewing machine and thread

1. Lay one piece of fabric right side up and the second piece of fabric on top of it right side down.


2. Layer the piece of batting on top.


3. Using a ¼ inch seam, sew all around the three pieces. Leave a 2 inch opening for turning.


4. Trim your corners.


5. Pull the fabric through the 2 inch opening. You may need to use a dowel or dull pencil to push out your corners. Tuck your 2 inch opening in and press with an iron.


6. Sew your opening shut. You can just sew the two inches or you can sew down that whole side. Whatever suits your fancy.


7. On one of the sides that is now 5 ½ inches long, sew down one piece of the Velcro. Once this is done, turn your square over and sew the other piece of Velcro down on the opposite side.


8. Attach it to the handle of your suitcase. Now you're ready to travel in style.

Monday, June 29, 2009

Monday Moments: Family Vacations

Remember how I was supposed to go on vacation and instead got called to jury duty. Dang civic duties. Well, we're finally getting around to taking that scheduled trip and I'm so excited! A week at Horseshoe Canyon Ranch, courtesy of my awesome grandparents!

I have lots of very fond memories growing up of road trips, family reunions, and other fun vacations my parents made sure to take us on. We learned silly songs, ate lots of junk, and probably annoyed the heck out my parents. But hey, that's what it's all about right. These are the days they'll remember...

So, what are your favorite family vacations? Have they happened yet? Are they yet to happen? Are there any great get-away ideas you want to share?

I hope you make some fabulous memories this summer!

Saturday, June 27, 2009

Looking for a favor...

I realize this has nothing to do with My Tiny Sweet Cheeks or babies in general, but I've learned to never underestimate the power of the internet.

We have decided to sell our 2006 Nissan Xterra and are hoping to spread the word. Please pass this along to anyone you know who is interested in purchasing a great SUV!

Visit HERE to see all its features and points.

We're willing to get it wherever you are:)

Thanks for your help.

Friday, June 26, 2009

Freebee Friday: Fourth of July

Just a fun bib to get ya'll in the patriotic spirit! This giveaway will end earlier so you have it in time for the holiday, just FYI.

Check back next week for a big giveaway!!!

TO ENTER:
1 Entry: Create a new post about this Freebee Friday on your blog & leave a comment here! If you don't blog, you can also email and CC it to me.
{Please leave your email address if it is not on your profile}


1 Entry: Become a follower of My Tiny Sweet Cheeks. Leave a comment if you follow, please!

1 Entry: Add a My Tiny Sweet Cheeks button to your sidebar! Again, please comment!

Bonus Entry: Tell me what you're doing for the fourth!

Give-a-way ends July 30th, 2009 at 11:59 pm

The lucky winners will be selected by Random.org and will be notified by email. You will have one week to respond and claim your prize or another random winner will be chosen.

Thursday, June 25, 2009

Thrifty Thursday: Bleach

Bleach is one of those fail-safe cleaning supplies you always have in your cabinet. It's cheap. It's reliable. It also reeks, so if you're like me you don't use it too often. Here are some unique ways to safely use it!

Brighten up glass dishware
Put the sparkle back in your glasses and dishes by adding a teaspoon of bleach to your soapy dishwater as you're washing your glassware. Be sure to rinse well, and dry with a soft towel.

Increase cut flowers' longevity
Freshly cut flowers will stay fresh longer if you add 1/4 teaspoon of bleach per quart (1 liter) of vase water. Another popular recipe calls for 3 drops of bleach and 1 teaspoon of sugar in 1 quart of water. This will also keep the water from getting cloudy and inhibit the growth of bacteria.

Kill weeds in walkways
Do weeds seem to thrive in the cracks and crevices of your walkways? Try pouring a bit of undiluted bleach over them. After a day or two, you can simply pull them out, and the bleach will keep them from coming back. Just be careful not to get bleach on the grass or plantings bordering the walkway.

Clean plastic lawn furniture
Is your plastic-mesh lawn furniture looking dingy? Before you place it curbside, try washing it with some mild detergent mixed with 1/2 cup of bleach in 1 gallon of water. Rinse it clean, then air-dry.

Wednesday, June 24, 2009

Workin' Wednesday: Economizing Measures


Recently there have been some changes in my life that have caused me to look even closer at my budget. I was raised to be frugal, but at certain times, frugality becomes more of a necessity than a lifestyle. Total bummer, but what do you do?

Looking around on the internet I cam across this great blog Economizing Measures. The goals: being thrifty, frugal, and green.

There are some of the most interesting posts - with everything from saving money on groceries, to making your own laundry soap, to cheaper entertainment ideas.

Check it out, see if it can make a difference in your home!

Tuesday, June 23, 2009

Tutorial Tuesday: Adding Ruffles

This week I had another request to learn how to add ruffles to onesies. I found this tutorial HERE and am hoping I either have a little girl or a friend does so I can try this out. Looks so cute and pretty easy too! Enjoy.

What is it about big poufy diapered baby butts adorned with ruffles? You just gotta love it!

I may be the only sewer in the world who doesn’t hang on to every bit of scrap fabric… I have one medium sized bin and that’s all I allow myself, so I end up with only the bits and pieces I really love. This was a great way to use up some of those smallish scraps. I used Steam-a-Seam2 double stick fusible web to trace, cut, and iron on baby's name, Liv, in all lower case. Here’s the scoop on how I made the ruffles. Measure the butt part of the onesie and cut strips, mine were an inch and a half wide, of coordinating fabric twice the length (maybe a little extra if you want a more serious ruffle going on). I used pinking shears on both edges of the strip… it’ll fray a bit when washed but I kind of like that look anyway and it makes this project extra simple. Baste a line of stitches down the center of the strip. Pull the bottom thread of your basting stitch to gather it up. Line the edges of the strip up with the side seam of the onesie, pin the ruffle down randomly across the butt, ending with the other edge of the ruffle even with the other side seam of the onesie. Sew down the middle of the ruffle & pull out the basting stitches. Pin the next strip above or below it and repeat. Instant cuteness!

Monday, June 22, 2009

Monday Moments: What do you do in the Summertime?

I love being a mom in the summertime. Obviously, I love being a mom all the time, but in the summertime especially. I love being able to introduce babies to grass for the first time, to soak in the rays and enjoy the beautiful world we live in.

So here are some fun things I have/will do this summer to spark you into getting outside and live vicariously through your kids.

Please share any fun things you're thinking about as well!

1. Visit the Sno-Shack
2. Run through the sprinklers
3. Walks
4. Sparklers
5. Kiddie Pools - soak your toes while the kiddos splash away
6. Picnic at the park
7. The Zoo or Petting Zoo's
8. Relay Races
9. Sidewalk Chalk
10. Giant Bubbles (for tutorial see HERE)
11. The Rodeo
12. Homemade Ice-Cream (if you have a good recipe, please share!)
13. Bike Rides
14. Sand castles
15. The Drive-In
16. Wash your own car

Thursday, June 18, 2009

Well, I finally made it back. Flying stand-by has its perks and its definite drawbacks. I feel as if I have neglected you all, but I promise to be back with a vengeance on Monday. Thanks for being so patient with me!

Sunday, June 14, 2009

Stuck

I am stuck in Redmond, OR due to a series of unfortunate events. Hope to be returning soon :)

Friday, June 12, 2009

Freebee Friday

Sorry ladies, I've been out of town this week and next and am not up to date on good giveaways, or able to host ones of my own. But please leave comments letting the others know of any good ones!

Happy weekend!!

Thursday, June 11, 2009

Thrifty Thursday: 4 Nontoxic Bug Blasters for the Kitchen

You can make your kitchen a no-fly zone for insect pests with nontoxic repellents and traps that you can make from everyday kitchen staples.

To get rid of fruit flies hovering in the kitchen, get out a fine-misting spray bottle and fill it with rubbing alcohol. Spraying the little flies knocks them out makes them fall to the floor, where you can sweep them up.

Make your own pest strips by covering empty paper-towel or toilet-paper rolls with transparent tape, sticky side out. Hang them in the kitchen or wherever else you need them.

Keep your kitchen free of flies with a homemade flytrap that uses no toxic chemicals. In a small saucepan, simmer 2 cups of milk, 1/4 pound of raw sugar, and 2 ounces of ground pepper for about 10 minutes, stirring occasionally. Pour into shallow dishes or bowls and set them around the kitchen, patio, or anywhere the flies are a problem. The pestiferous bugs will flock to the bowls and drown!

To ant-proof your kitchen, give it the lemon treatment. First squirt some lemon juice on door thresholds and windowsills. Then squeeze lemon juice into any holds or cracks where the ants are getting in. Finally, scatter small slices of lemon peel around the outdoor entrance. The ants will get the message they aren't welcome.

Wednesday, June 10, 2009

Workin' Wednesday: the Buti Bag Company


So as much as I love bags, I am not a huge fan of big diaper bags. I prefer the smaller bags that can hold all the necessities and still manage to be chic. Problem is, very few diaper bag companies manage to make small bags that can actual hold all the necessities, look cute and not fall apart. The Buti Bag Company, however, got it right. Their Bundle ($59.99) is an amazing diaper clutch/bag that is extremely well made, durable and super cute. With tons of roomy pockets and their ingenious closure, these bags are perfect for moms of infants and toddlers. Best of all, because of their chic prints and style, the bags can be used as travel bags to hold toiletries and make-up after your little one is through with diapers! Just recently, The Buti Bag Company released their simplified version of the Bundle called the Bundle Baby. With fewer pockets and an included changing pad, the Bundle Baby ($39.99) is perfect for the budget-minded mom. Check out the Bundles and all the other cool stuff The Buti Bag Company has on their website at http://www.butibag.com/ I suggest picking up a couple of their binkmeisters as well. They work not only to hold pacifiers, but also sippy cups and snack cups!

This post was found HERE

Tuesday, June 9, 2009

Tutorial Tuesday: Ribbon Wands

By special request, I've come up with a couple of different sites on how to make Ribbon Wands. I personally don't know what these are, and have found a couple of different "looks" so please look at all the sites and gather the info you need!


These seem to be the basic instructions, however:

SUPPLIES

All supplies can be purchased at a local craft and hardware store.

  • Ribbon: 3 yards
    Choose a color combination, or one solid color, that suits your needs. Additionally, if you want your ribbon wands to be fuller than those shown in the sample image, just add more ribbon.
  • Dowel rods: 1/4" width
    Craft stores sell dowel rods at precut lengths in bags of 8-10. The 12" length makes for an ideal ribbon wand. While you can also purchase dowel rods at a hardware store, you will most likely have to cut them to your desired length.
  • Paint
    Purchase one small bottle of craft paint in the color of your choice. For a simpler option, you can also leave them unfinished.
  • Sponge brush
  • Sandpaper: Fine grade
  • Screw eyes: 214 x 13/16 size
    These can be difficult to screw into the head of each dowel, so use pliers after getting it started. Also, be gentle, as the wood can split.

DIRECTIONS

  1. Using the sponge brush, paint all dowels. Stand them on end in holes punched in a piece of styrofoam to dry.
  2. After the wands have dried completely, gently sand them with fine grade sandpaper. Painting may roughen the surface, so sanding them will remove rough areas without removing the paint.
  3. Attach a screw eye to one end. **NOTE** The above picture has a fishing line swivel attached to the screw eye - I personally really like this look.
  4. Cut the ribbon into 15-20" lengths. Cut ribbon at an angle to avoid any fraying that might occur.
  5. Gather a total of 5-6 ribbons and slip through the screw eye. Tie in a nice, tight knot. **NOTE** Again, the above picture uses only 1 long, thick ribbon.
Check out more great ideas and images HERE.

Also, these are also available from a seller on Etsy to buy and super cute. See her products HERE.

Monday, June 8, 2009

Monday Moments: on Being a Mom

I have a very sick, very ornery little boy, so this post will be short to say the least.

But as I was lying in bed last night around 3 a.m. after finally getting him back to bed, I thought, "Man, this is what being a mom is all about. I'm so tired, but I'd get right back up if I needed to."

So kudos out there to every mom who has ever nursed a fevered brow, been sleep deprived, and still manages to put on a happy face!

Friday, June 5, 2009

Freebee Friday: Something for Dad

I was just thinking with Father's Day around the corner, wouldn't it be awesome to win something just for him. Check out this giveaway HERE. The deadline is coming up rather quick (Saturday night) but just hop on over right quick. (I can use that phrase, I'm from Arkansas!)

Good luck Ladies, and happy weekend!

Site: Mom Start
Giveaway: Sports Themed Personalized Cuff Links
How To Enter: leave a Comment
Value: $50.00
Deadline: 6/6/2009 11:00 PM

Thursday, June 4, 2009

Thrifty Thursday: Speed Cleaning in Your Kitchen

Distilled white vinegar is one of the best grease eliminators around. Here's how to put it to good use.

Grease: After frying, wash off grease splatters with a sponge dipped in undiluted white vinegar. Rinse with another sponge soaked in cold water, then dry with a soft cloth.

Dishwashing Liquid: Pour 3 to 4 tablespoons white vinegar into your dishwashing liquid bottle and give it a few shakes. The vinegar will increase the detergent's grease-fighting capabilities and make it last longer.

Frying Pans: Boiling 2 cups vinegar in your pans for 10 minutes will keep food from sticking to it for several months at a time.

Stainless-Steel Cookware: Remove burned-on grease and food by mixing 1 cup distilled cinegar in enough water to cover he material (if it's near the top of a large pot, you may need to increase the amount of vinegar). Boil for 5 minutes. The material should come off with some mild scrubbing.

Broiler Pan: Get blackened, cooked-on grease off by softening it up with a solution of 1 cup cider vinegar and 2 tablespoons of sugar. Apply the mixture while the pan is still hot, and let it sit for an hour or so. The grime will slide of with a light scrubbing.

Kitchen Table or Counter: Eliminate grease stains by wiping them with a cloth dampened in a solution of equal parts white vinegar and water.

Hot Plate: Does it look more like a grease pan? To get it back in shape, wash it with a sponge dipped in full-strength white vinegar.

Oven & Grates on Gas Stoves: Fight grease buildups in your oven by wiping the inside with a sponge soaked in full-strength white vinegar once a week.

Wednesday, June 3, 2009

Workin' Wednesday: Toni Tierney


So we all know that boy clothes are never as cute as girl clothes. Well that is, until now. Toni Tierney has some of the coolest, funkiest, cutest designs in her infant boy layette line that I have ever seen. Her designs are so fabulous and are reminiscent of vintage clothing with a modern twist. I love all the baseball designs she has in her collection, as well as her "hip CEO" creation shown for boys. And the girl clothing in Toni's collections are beautiful, all with amazing details and fun silhouettes. All the clothing is made in the USA and made from super soft high-end 100% cotton. Better yet, Toni helps empower stay-at-home moms by hiring them to make the clothing she designs and allowing them to stay at home with their families. Check out the Toni Tierney website for weekly specials, where you can get amazing pieces for almost 50% off! Visit www.tonitierney.net

This post was found HERE

Tuesday, June 2, 2009

Tutorial Tuesday: High Chair Make-Over

I got a high chair off Craigslist FREE and need to redo the seat cover on it. It's great having at Grandma's house, but it just isn't going to last much longer if it doesn't get a needed facelift. I figured it couldn't be that hard, but I went searching on the internet looking for some tips. I found this great tutorial HERE that is exactly what I need to do. Hope it comes in handy for ya'll even if it's just so that such an eye-sore in the kitchen can match! Can't wait to get started on mine.


BEFORE

AFTER

I didn't write a detailed tutorial for this one because it's hard to give accurate measurements since all highchairs are different, but here are the basic steps in case you want to make your own...

Supplies:
Oil cloth (because it's wipeable) --you can find this all over the internet
Quilt binding (bias tape) --I used the extra wide because I'd never done this before, but I think I'd use something a little skinnier if I were to do the project again
Denim needles --DO NOT try and use regular "all purpose" sewing needles-they will break!! Take it from me, I made that mistake
Foam --you can decide on the thickness you want, but I used the skinniest foam Joanns' had (I believe it was 1/2" thick?)

**Tips and tricks from the experts--you may want to read a little bit about oilcloth if this is your first time sewing with it. I found some helpful advice on Sew Mama Sew!

General instructions:
Lay your original high chair cover on butcher paper and trace in two parts. Trace the seat as a separate piece and the back as a separate piece. You don't need to include a seam allowance when you trace.

Lay the pattern pieces down on your oilcloth and cut two of each pattern piece (two backs and two seats)
Cut one piece of foam for the back, making it about 1/2 inch smaller all the way around (this way you are not forcing your sewing machine to stitch through the binding, two layers of oilcloth AND the foam!) and one piece of foam for the seat (same thing, smaller all the way around). Use your original seat cover as a guide for the foam. For example, on mine the flaps where the child's legs stick out of the high chair didn't have any foam in them, so I cut that part off of the foam piece

Lay out your stacked layers on the floor---oilcloth, foam, oilcloth. Cut off any excess you see (or where they don't match up quite right)

Pin the bias tape to your layers. I did a section at a time, leaving the top of the seat and the bottom of the back piece raw. You will be sewing these two parts together later.

Use a zig zag stitch (very forgiving in case straight lines are not your forte) to sew close to the inside edges of the bias tape.


Sew the bias tape all around the back and seat pieces (leaving the aforementioned edges alone-hopefully this part makes sense as I don't have a picture of it).

Once the bias tape is sewn on, you only have one seam left!! Put right sides together (the right sides are the sides that you want to show when the cover is in the high chair). Match up the seat and back piece along the raw edges and use a straight stitch to make a seam.


Voila! Completely unique and custom high chair cover!!

Monday, June 1, 2009

Monday Moments:

I officially survived my first week of flying solo - my DH had to go away on business. Although I do have to admit by surviving I mean that I am a total baby and couldn't handle the "aloneness" of it all and took off down to my parents house.

I have a new found respect for all single parents out there. How do you do it? I am not even working and find it so hard. I keep looking for someone to hand my boy off to when I've just had it and feel like I can't take it anymore.

Overall he is such a good kid, but when it's just you and an eighteen month old 24/7 you start to feel like you're losing your mind.

I know I'm not the only one who has ever been left alone with their kids. What did you do to entertain them and yourself? I am looking for ideas to fill up the month of June so I can stop imposing on my family and be a real grown-up.

Friday, May 29, 2009

Freebee Friday: Sew, Mama, Sew!


Sew,Mama,Sew! has organized a HUGE giveaway day with TONS of vendors!
Check out all the amazing shops that are participating HERE.
You actually go to the individual vendors sites in order to enter, making it great because you get to choose what you could win - not just a "get what you get" giveaway.

Contest runs from May 27-31.
Don't you just love free stuff?

Freebee Friday Winners!

The winner of the set of 4 Striped & Polka Dot Burpees is

#6 Elliott Mom said...
These would be great for my twins that are coming! I'm a follower!

Thanks to all for participating!

I will be contacting you via email and you will have one week to claim your prize before another winner will be chosen through Random.org

Thursday, May 28, 2009

Thrifty Thursday: Baby Food

I found this HERE and wanted to share it. I am so excited to try this with baby #2. I plan on using lots of the veggies from my garden and saving even more money this way.

Homemade Baby Food
By Kathleen Gordon-Ross,
senior editor

A special thanks to all the mom's who helped make this article possible!

As a new mother, or even an experienced one, deciding what foods to feed your baby and when, can be really difficult. It's so hard to tell when your little one is ready to try rice cereal and when to start introducing new foods and textures.

To make it even more complex, everyone has an opinion. Some say to start with vegetables so they don't get hooked on the sweet fruits... others talk about introducing foods by color… Thankfully, there's LOTS of helpful information out there on when and how to introduce your baby to solid foods.

We've asked mothers from across the country to share with us their favorite homemade baby food recipes and tips for making your own baby food. This is sure to save you a bundle at the check out counter and open your eyes to a whole new world of food possibilities for your little one.

VEGETABLE PUREE

MEAT PUREE

DUTCH APPLE DESSERT

SWEET PEA, CHICKEN & RICE

and many many more recipes found HERE

Let me know if you have tried this and/or if you have any more sweet tips! Thanks!!!

Wednesday, May 27, 2009

Workin' Wednesday: Madison Envy

I love to accessorize my life - and if your household is anything like mine, after food, diapers, and formula there is little money left over for you to play with. That is why I love Madison Envy.

It's an affordable, stylish way to add some glam to your everyday mom look. The jewelry is so fun and holds up to little hands pulling on it. I also love the T-shirts they have. While they are one of the more expensive things on the site, they are fabulous! I have worn mine numerous times and it always fits like the first time I wore it. No stretching! It's also made out of that super soft stretchy tee material - not just hard, crappy cotton.

This is one of my favorite jewelry sets that Madison Envy offers. Definitely worth checking out. Easy on your style and your wallet!


Tuesday, May 26, 2009

Tutorial Tuesday: Giant Bubbles

You need to prepare ahead for this one folks!

Ingredients:
4 C Water
1 C Dawn dishwashing liquid
1 Tbsp. Glycerin (can buy in pharmacy)

Let set for one week.

Told you not to leave it until the last minute!

Fast Bubbles (In case you didn't believe me)

Ingredients:
3 C Water
2 C Dawn dishwashing liquid
1/2 C Corn Syrup

These can both be used with reshaped coat hangers or traditional small blowers. If hangers are used, fold the hand perpendicular to round bubble maker portion and use a large flat container for the liquid. The large bubbles are great fun!

Friday, May 22, 2009

Freebee Friday: Polka Dot and Striped Burpies

It's that wonderful time of the week again, Freebee Friday. But before we get into that, please note that I will not be posting this next Monday, the 25th. My DH is leaving us for a month on business and we are spending as much time as possible as a family before he goes. Thanks for understanding!

This week I'm giving away a set of four handmade Burpies - double sided and super absorbent - the only ones I'll use!

Each Burpie measures 11"x17" and is double sided. They are made of soft, flame-retardant, flannel.

Side A

Side B

TO ENTER:
1 Entry: Create a new post about this Freebee Friday on your blog & leave a comment here! If you don't blog, you can also email and CC it to me.
{Please leave your email address if it is not on your profile}


1 Entry: Become a follower of My Tiny Sweet Cheeks. Leave a comment if you follow, please!

1 Entry: Add a My Tiny Sweet Cheeks button to your sidebar! Again, please comment!

Bonus Entry: Leave me a tutorial idea - something you've been dying to learn how to do.

Give-a-way ends May 28th, 2009 at 11:59 pm

The lucky winners will be selected by Random.org and will be notified by email. You will have one week to respond and claim your prize or another random winner will be chosen.

Thursday, May 21, 2009

Thrifty Thursday: Using Fabric Softner Sheets

I, of course, never give out thrifty tips that I have not done myself - I swear to you, these work! To save my used dryer sheets I adopted an empty Kleenex box to keep on top of the dryer and in they go. It's great, takes up no space, and is again recycling something we commonly throw away! Hope these tips make your life a tad easier!

Pick up pet hair
Pet hair can get a pretty tenacious grip on furniture and clothing. But a used fabric softener sheet will suck that fur right off the fabric with a couple of swipes. Just toss the fuzzy wipe into the trash.

Lift burned-on casserole residue
Those sheets will soften more than fabric. The next time food gets burned onto your casserole dish, save the elbow grease. Instead fill the dish with hot water and toss in three or four used softener sheets. Soak overnight, remove the sheets, and you'll have no trouble washing away the residue. Be sure to rinse well.

Wipe soap scum from shower door
Tired of scrubbing scummy shower doors? It's easy to wipe the soap scum off the glass with a used dryer fabric softener sheet.

Consolidate sheets and make them smell pretty
To improve sheet storage, store the sheet set in one of the matching pillowcases, and tuck a new dryer fabric softener sheet into the packet for a fresh fragrance.

Abolish tangled sewing thread
To put an end to tangled thread, keep an unused dryer fabric softener sheet in your sewing kit. After threading the needle, insert it into the sheet and pull all of the thread through to give it a nonstick coating.

Wednesday, May 20, 2009

Workin' Wednesday: Just Because I am Me

Usually I feature a mompreneur on Wednesdays but I came across Shaina's blog while searching for the perfect superhero cape.


Yes, it is a personal blog, but it is filled with comedy, recipes, scrapping, and love. You can tell she is a happy-go-lucky kinda girl, with 5 kiddos. Now that right there is inspiring to me.

I am dying to try her Thai Lettuce Wraps recipe and am also thinking this Snicker's Salad sounds pretty dang good.

Anyway, swing over her way for some laughs and inspiration. If nothing else, she sure is pretty!

Monday, May 18, 2009

Monday Moments: the Big Boy Bed

I know I already posted on this before, I was internally (or rather bloggally) debating whether or not to purchase a toddler bed, when to move my little boy out of the crib, and so on and so forth. Well this weekend we bit the bullet and did it. Long story short, we ended up getting a bunk bed - only putting the top together - and are using that. I love that it's big (I can kick the kid out and put an adult in if I have to) and I love that the side rails are attached with no chance of coming undone.

The first night was miserable - or rather the first morning. After crying for quite a while, he finally fell asleep, all be it turned the wrong way, in bed. Then at six a.m. the little monster awoke with no chances of just going back to sleep. Needless to say, it's been a day.

Tonight (Sunday) he just laid right down and so far I haven't heard a peep.

Could it be? It's definitely too good to be true that after one night he's made the adjustment.

I'm keeping my fingers crossed.

P.S. His cute little hooks on the wall have already had to come down due to a serious case of jumping on the bed and pulling on the hooks.

Friday, May 15, 2009

Freebee Friday: Madsen Cycle Contest

Okay, I know this is a long way off, but can't you just see yourself cycling around town, being such a cool mom and being healthy at the same time? It's worth a shot to try to win it...

Madsen Cycles Cargo Bikes

We'd like your help in spreading the word about the MADSEN Cargo Bike. To that end, we'll be giving away two MADSENs on July 15th 2009, and anyone with a web presence (blog, Twitter, Facebook, website, MySpace, etc.) can win!

How do I win?
It's simple, just link to MadsenCycles.com (using the options on the right) and on July 15th we'll select two winners from those who have linked and sent traffic to us.

What if I already bought a MADSEN, or buy one before the contest is over?
Then you're in double luck! If you already own a MADSEN, we'll refund the price you paid for your MADSEN, and we'll send another one to you, or anyone you want to give (or sell) it to (inside the USA).

How will you determine the winner?
One winner will be selected at random from all of the sites who have linked to us. The other will be selected at random from the top 20 sites who sent us the most traffic.

I don't get very much traffic on my site, can I still win?
Yes! We're selecting one winner from the group of all sites who link to us without respect to how much traffic they send. Everyone is on equal footing.

Well I've got a huge site and I can crush you with traffic, what do I get?
Well, aside from our gratitude for crushing us, if you're among the top 20 sites who send us the most traffic, you'll have a one in twenty chance of winning.

So you are saying I can win if I link to you from my blog?
Yes! Anyone with their own web presence can win. This means blogs, websites, twitter, myspace, facebook, whatehaveyou.

Wait, if I link you from all those methods (except that whathaveyou thing) are you saying I'll be counted five times?
Hmmm, I guess you will. (Shhhh, we won't tell if you don't. Go for it!)

How will I know if you have recorded my link to you?
Set up your link, and click on it at least once yourself and you'll be in. It's really that simple.

Who is eligible to win?
Anyone in the United States who is 18 years or older.

Great! So how do I link to you?
Just select from the options at right.

Thursday, May 14, 2009

Thrifty Thursday: Ice Cubes

First off, sorry about not having a Working Wednesday yesterday -- I was having severe Internet difficulties. But I'm back now with a whole list of things you can use ice cubes for!

Remove dents in carpeting
If you've recently rearranged the furniture in your living room, you know that heavy pieces can leave ugly indents in your carpet. Use ice cubes to remove them. Put an ice cube, for example, on the spot where the chair leg stood. Let it melt, then brush up the dent. Rug rehab completed.

Mask the taste of medicine
No matter what flavor your local pharmacist offers in children's medicine, kids can still turn up their noses at the taste. Have them suck on an ice cube before taking the medicine. This numbs the taste buds and allows the medicine to go down, without the spoonful of sugar.

Pluck a splinter
Parental challenge #573: removing a splinter from the hand of a screaming, squirming toddler. Before you start jabbing with that needle, grab an ice cube and numb the area. This should make splinter removal more painless and quicker.

Prevent a blister from a burn
Have you burned yourself? An ice cube applied to the burn will stop it from blistering.

Reheat rice
Does your leftover rice dry out when you reheat it in the microwave? Try this: Put an ice cube on top of the rice when you put it in the microwave. The ice cube will melt as the rice reheats, giving the rice much-needed moisture.

Tuesday, May 12, 2009

Tutorial Tuesday: Appliqued Onesies


Martha Stewart recently shared a fun dog appliqued onesies how to on her show (and website). If you're anxious for an easy but brilliant project, this looks like a perfect option.
Tool and Materials:
French Bulldog Template or photo of a dog in profile (or any picture for that matter!)
Iron
Sewing machine
Scissors
Damp, clean cloth
Card stock
Patterned fabric
Trans-Web or other fusible webbing on release paper
Black marker
Blank baby onesie
Machine-sewing thread in a coordinating color for decorative topstitch
Hand-sewing needle
Button in coordinating color (optional)
See instructions here.
But if you're in the mood to skip the project and head straight to the shopping cart, visit Bella Blu designs: the inspiration behind (and demonstrator of) the craft.


Monday, May 11, 2009

Monday Moments: Mom's Day

I ended up in my old stomping ground this weekend to celebrate Mother's Day. My little brother is serving a mission for The Church of Jesus Christ of Latter-Day Saints in Honolulu, Hawaii and is allowed to call home on Mother's Day. Wanting to get to talk to him, and for the perks of being with my own mom, we ended up back home.

I was promptly reminded early on in the morning that being a mom will always take precedence no matter the day. But fortunately the benefits of mommy-hood far outweigh those moments where you think, "What did I do to deserve this?"

And now at the end of the day, I'm still thinking "What did I do to deserve this?" I have a fully active, adorable little boy who, even with his sticky hands, gives me kisses and loves, runs to me when he falls down, and shows me the world through his tiny hands. I don't know what I did to get such a gift in this life, but being a mom can't be beat.

I hope all you ladies had a wonderful day - I know I did.

Friday, May 8, 2009

Freebee Friday: Goodies for Mom

Found this great Freebee HERE from Goodies for Mom. I love getting a new swim suit every year, but this year, with money being tighter everywhere, haven't been able to swing it. Great opportunity ladies!

With swimwear season right around the corner, Land's End's Beach Living® suit separates are available in great cuts, styles, colors and prints. These separates include swim tops with adjustable straps that can be worn three different ways, side ties on swim skirts and bottoms that can be shortened or lengthened.

Last year Land's End sent me their popular V-neck Halter Swim Top and the Beach Living Solid Jersey SwimMini™. I actually bought the Beach Living Tummy Control Swim Shorts later on my own because although I do like the mini, the shorts are a more casual, comfortable choice for everyday wear. Can I just say that I love this suit? I love that I can mix and match the sizes so I can order the appropriate size even if I'm not a perfect match sizewise. In addition, have a two-piece suit that is not a bikini (which believe me when I tell you no one would want to see) is fabulous when you are rushing to go to the bathroom with little ones in tow. I love not having to completely undress and redress everytime. This is an extremely high quality suit that you can get for around $100. Hmm, that brings me to our giveaway...

...This would be the perfect thing you can buy if you win the $100 gift certificate from Land's End they are offering one lucky Goodies for Mom reader.

ENTER TO WIN
To enter the giveaway, just visit Land's End and tell us what you'd buy if you win. Deadline is Monday, May 11, 2009 at midnight EST. Open to US residents only.

LEAVE YOUR COMMENTS HERE

More Chances to Win
Extra entries for:

  • Linking to this contest
  • Subscribing to our feed, follow us on Twitter or following Goodies for Mom with Blogger
  • Having a link or button to the Goodies for Mom site on your site
  • Tweeting about this giveaway
Just leave us a separate comment for each letting us know. Make sure to share your links with us.

Thursday, May 7, 2009

Thrifty Thursday: Keep on Recycling

Our last segment, 3 of 3, when it comes to those great surprising garden secrets. Check out part 1 HERE and part 2 HERE.

Savvy recycling ideas for gardeners didn't stop in Grandpa's day. You should always be on the lookout for new things around the house that you can use in the garden, and maybe you can even start a frugal gardening tradition of your own. Here are a couple of ideas to get you started:

To create cushions for your knees when you're working in the garden, just recycle tired computer mouse pads. You can kneel on them or attach them directly to the legs of your old gardening pants with duct tape. {Tacky? Yes. Efficient? Definitely Yes!}

To make sidewalk or driveway reflectors, use discarded CD's (especially those that come in the mail). They are a lot more attractive than those ugly orange reflectors. Drill small holes in each CD and screw it to your mailbox post or onto a wooden stake and push it into the ground. Install several of them to light a nighttime path to your front door or through your gardens.

Isn't technology wonderful? It gives us not only amazing inventions but also new products to recycle!

Wednesday, May 6, 2009

Workin' Wednesday: Tricia's Dish

Who wouldn't want to visit a blog whose logo is living and eating better for less from Cleveland to Brazil and beyond? If ya'll are anything like me at all, you like budget friendly dishes, FREE things, and food.

Tricia began Tricia's Dish at the beginning of 2009. Her focus is free/affordable entertainment, independent restaurants, cooking (especially on a budget, as well as vegetarian options), fitness & beauty, mystery shopping, money saving and more.

One of the best features - weekly giveaway's.
Each Friday, Tricia features two giveaways: one Cleveland-area restaurant or attraction/event, and one nation-wide product.


She also lets you in on juicy little money saving bits like this:


Oprah's giving away chicken. Get two pieces of grilled chicken, two individual sides and a biscuit. (This coupon can be printed multiple times)

Limited Time Download Here.
Coupon download available from 9 a.m. CDT on May 5, 2009, to 9:59 p.m. CDT on May 6, 2009. Coupon is redeemable at participating KFC® locations in the United States from May 5, 2009 to May 19, 2009—excluding Mother's Day, May 10, 2009.

Sweet! Dinner for four all for the price of drinks - unless you're cheap like me and just take water. Then it's absolutely FREE!

Tricia is currently making plans to move to Brazil later this year and has also created Move to Brazil which is a developing library of information about traveling, living and investing in Brazil.

Definitely worth a trip her way, especially on those Giveaway Friday's. Check her out!!!

Tuesday, May 5, 2009

Tutorial Tuesday: Fusing Plastic Bags


Such a cool idea! I'm dying to try this out - hmmm, maybe while I wait around for stinkin' Jury Duty... found it HERE!


Do you have one zillion plastic drugstore and grocery bags under your sink, or perhaps smushed into a drawer? Ever wanted a cheap and easy use for them? One that leaves you with an intriguing and useful homemade craft supply? Do you have an iron? Why don't you fuse them together?

What you'll need
Plastic bags (thin, flimsy ones work best)
Parchment paper, freezer paper or plain old copier paper
Iron (and your favorite ironing surface)

Making it

Flatten out the bag and trim the bottom seam and handles off. This allows the bag to be opened up into a larger rectangle of plastic.

Turn the bag inside-out if it has printing on it. Once the ink heats up, it comes off the bag and makes a huge mess. If the bag has an interesting design that you'd like to preserve, try using a clear plastic bag layered on top of the printed one.
We find that between 6-8 layers of plastic gives the best results. So, you can either fold your bag twice until it is 8 ply thick, or use three or more bags layered on top of one another. Trying to fuse less than 6 layers often results in little holes forming in the finished piece and a generally weaker material.
Sandwich your plastic bags between the parchment paper


Next, run a hot iron (we set ours to "Rayon", but you will need to experiment a little to see what works for you) and keep the iron moving constantly. Make sure to get the edges, and after about 15 seconds, flip it over and iron the opposite side for a few seconds.


Peel a corner of the paper back to see if the plastic is fused together. It should be fairly smooth and "one sheet" to the touch (watch out, it's a little hot). If the layers are not all melted together, iron it some more.


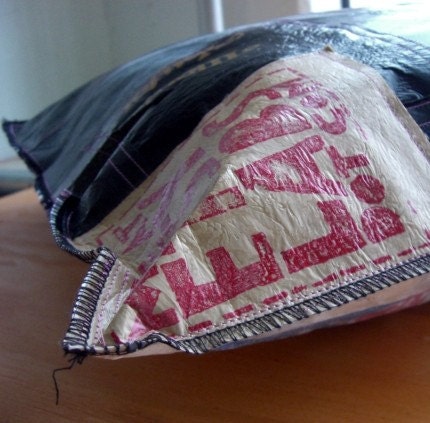
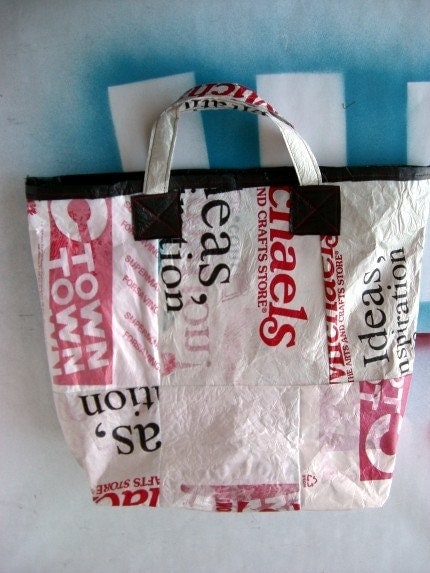
Peel the parchment paper away from the finished plastic sheet. Voila. Now, you can use this stuff to make a million things. We've made re-usable grocery totes, wallets, and floor cushions; I think its an inexpensive way to make waterproof linings for beach bags and makeup clutches.


Here are a few more rad examples of what you can do with this stuff, courtesy of Etsy seller Eclipse


Alright, y'all. Don't forget to open a window when you do this to avoid potentially brain-damaging fumes.