

.jpg)


Day 6
Chunky baby legs that are cute naked or covered up.
~~~
I have been wanting some of those darling baby leg warmers, but am too stingy to play boutique store prices. You know me and thrifty go hand-in-hand. So, of course, I turned to my wonderful internet and found a tutorial HERE at Everything Your Mama Made and More. So glad resourceful women figure these things out for me.
I'm thinking of making a pair for myself too!
You Need:
Womens tube/knee socks (6m-6yr) or Womens crew socks (0-18m) Girls knee socks also work GREAT.
Sewing machine or needle & thread
Scissors
Pins
What to Do:
First cut the socks into sections as pictured below. You will toss the heel & toe scraps, but keep the bottom of the foot. Note: for this tutorial I am working with crew socks, but the process is the same as with tube socks.

Take the section remaining from the foot & you want to fold it inside of itself as pictured below. You should have the nice side of the sock on the outside & inside with a fold on one end & both raw edges on the other.
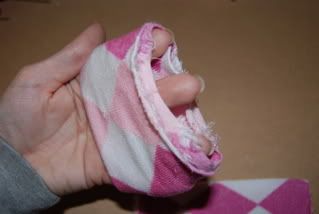
Stick the long section of the sock inside your newly created tube. This would give you 3 raw edges on the side we are going to sew, the other side will have the folded edge & the finished edge that was originally the top of the sock. If you have a pattern such as stripes or argyle as I used you may try to get them to line up. Once you are happy with the positioning pin together. Make sure to pin just 3 layers, not all 6 or you won’t have a hole to stick your little ones leg through when you are finished.

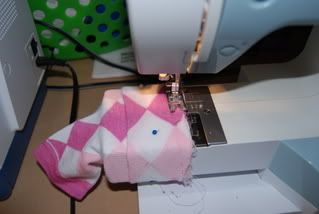
Time to Sew! Set the stitch length on your sewing machine to 4 (longest stitch), this will allow the most stretch. If the long straight stitch just doesn’t stretch enough for you can also us a narrow zig zag stitch… width at 2 & length at 3. You want to stretch the pinned side over the arm of your sewing machine & sew a straight stitch all the way around. If you can’t get it to stretch over then you can use what ever method you use to sew circles normally, or you can simply stitch it together with a needle & thread the old fashion way.
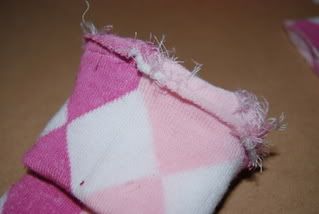
OPTIONAL Your finished seam should look similar to this. For a cleaner more professional look you can use pinking sheers, a zigzag stitch, or serge the seam for extra strength & to prevent unraveling.
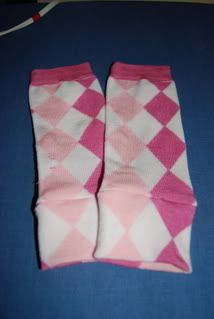
Then simply fold the trim down (putting the seam inside) & TADA… a baby & toddler leg warmer simply make another one & test them out on the nearest happy child!


No comments:
Post a Comment